Creating a plugin
Throughout the tutorial, you will create a plugin that displays items to promote in your store. Start by creating a basic plugin and deploying it in PlentyONE .
This page covers the following steps:
-
Installing Node.js
-
Installing a plugin generator
-
Creating a new plugin
-
Deploying your plugin in plentymarkets
-
How to create a git repository for existing DevTool plugin
Installing the plugin generator
You can create new plugins by running a plugin generator. To install the generator, you need an active version of Node.js. To check if you have Node.js installed, open a terminal and run the following command:
$ node --versionIf you have Node.js installed, it’ll show the currently active version:
$ node --version
14.15.3
If you don’t have Node.js installed, you can download it from nodejs.org.
After installing Node.js, you’re ready to install the plugin generator. To install the generator, run the following command:
$ npm i -g yo @plentymarkets/generator-pluginNow you can create your plugin.
Creating the plugin
To create your first plugin, carry out the following steps:
-
Open the command line.
-
Navigate to the plugin set folder in your workspace.
-
Run the following commands:
$ mkdir TopItems $ cd TopItems $ yo @plentymarkets/plugin -
Follow the prompts of the generator.
-
For each promt, the generator supplies a default value.
-
Except for the plugin type, confirm the default value by pressing enter.
-
For the plugin type select the
templateoption.
-
The generator creates all the files required for a basic plugin.
workspace/
│
├── 12345/
│	│
│	└── 1/
│       │
│       └── TopItems/
│           │
│           ├── meta/ (1)
│           │
│           ├── resources/ (2)
│           │
│           ├── src/ (3)
│           │
│           ├── .yo-rc.json
│           │
│           ├── config.json (4)
│           │
│           └── plugin.json (5)
│
└── plenty.ignore| 1 | Stores information about the plugin, for example guides and app images. |
| 2 | Provides templates, scripts and other files that are accessed while the plugin is running. |
| 3 | Contains the source code of the plugin. |
| 4 | Contains options that the user can configure. |
| 5 | Contains the details required to run the plugin. |
Deploy the plugin in your system to see the result.
Plugin Deployment Guide: From GitHub to Plenty System
This guide outlines the steps to deploy your plugin, hosted on GitHub, to your Plenty System backend.
Prerequisites
-
A GitHub account with access to your plugin repository.
-
Access to your Plenty System backend.
Step-by-Step Deployment Guide
1. Prepare Your GitHub Repository
-
Go to https://github.com/login and sign in with your credentials.
-
Locate Your Repository:
-
Navigate to the specific repository containing the plugin you wish to deploy.
-
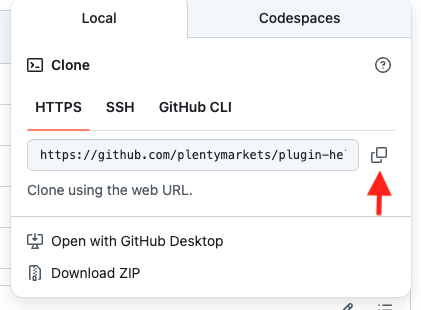
Copy Repository URL:
-
Click the green "Code" button on your repository’s page.
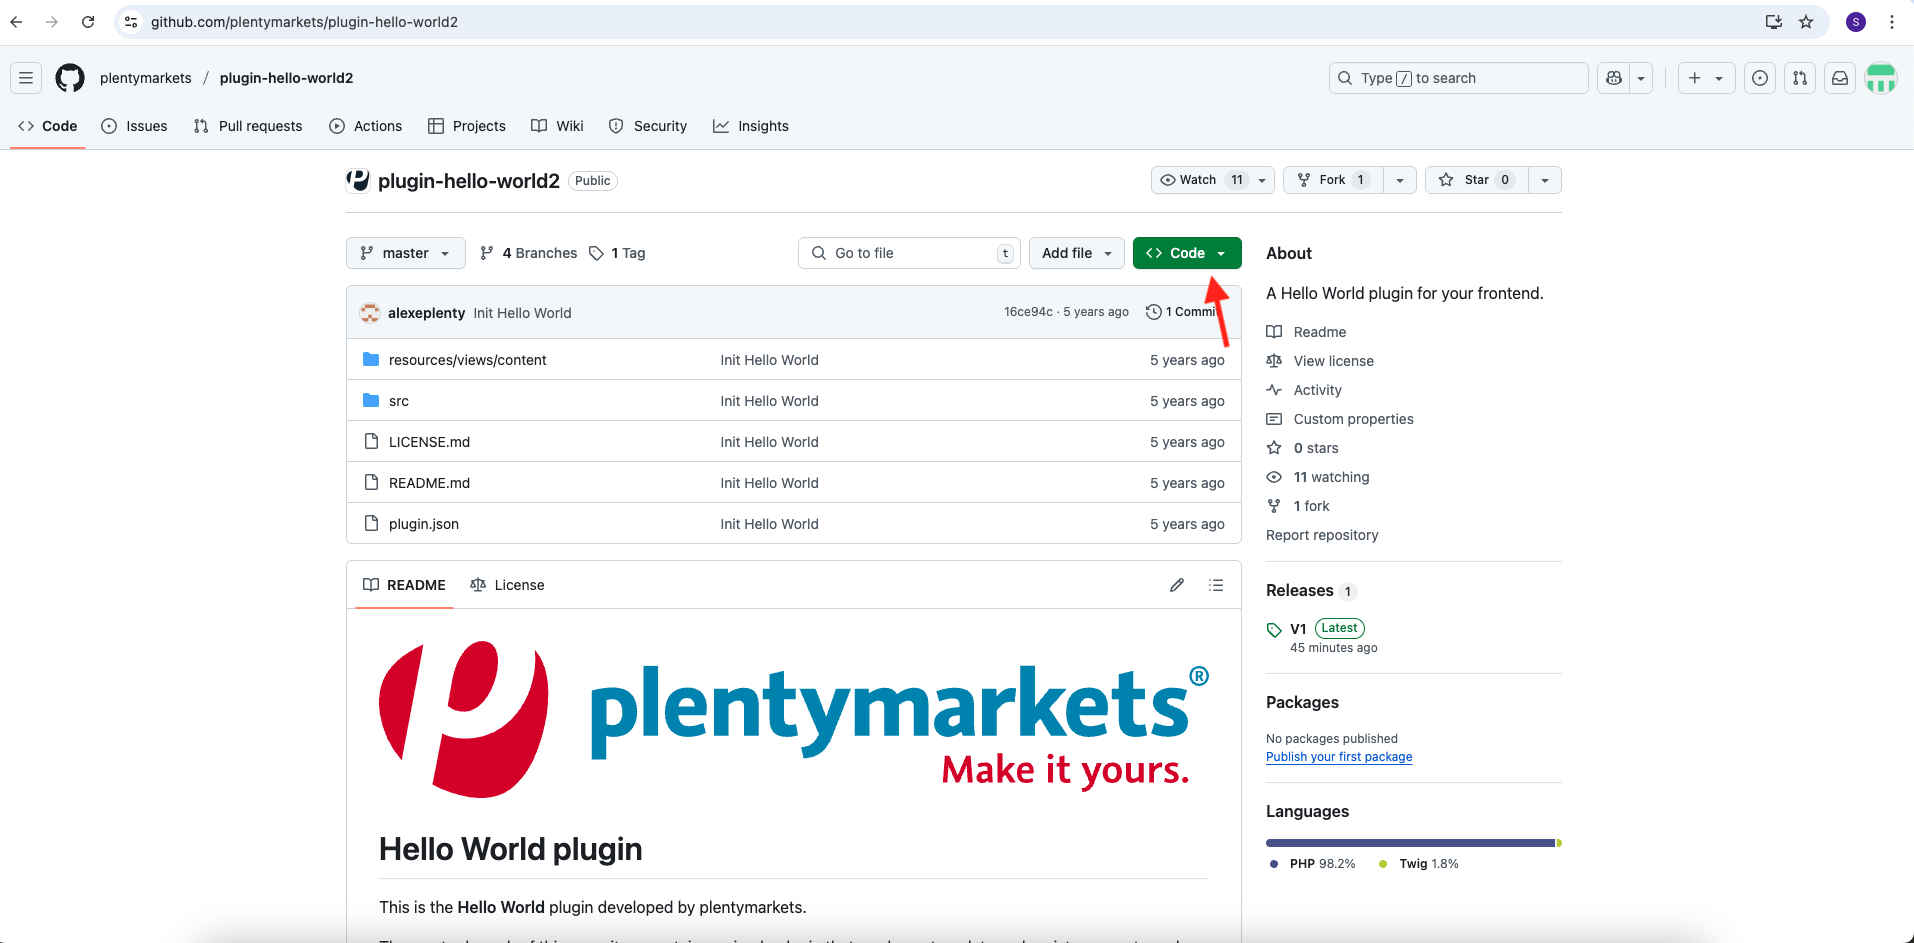
* . Copy the provided repository URL Under the "HTTPS" tab. This URL will be used to link your plugin set in Plenty System.
2. Configure Your Plenty System Plugin Set
-
Log in to your PlentyONE backend.
-
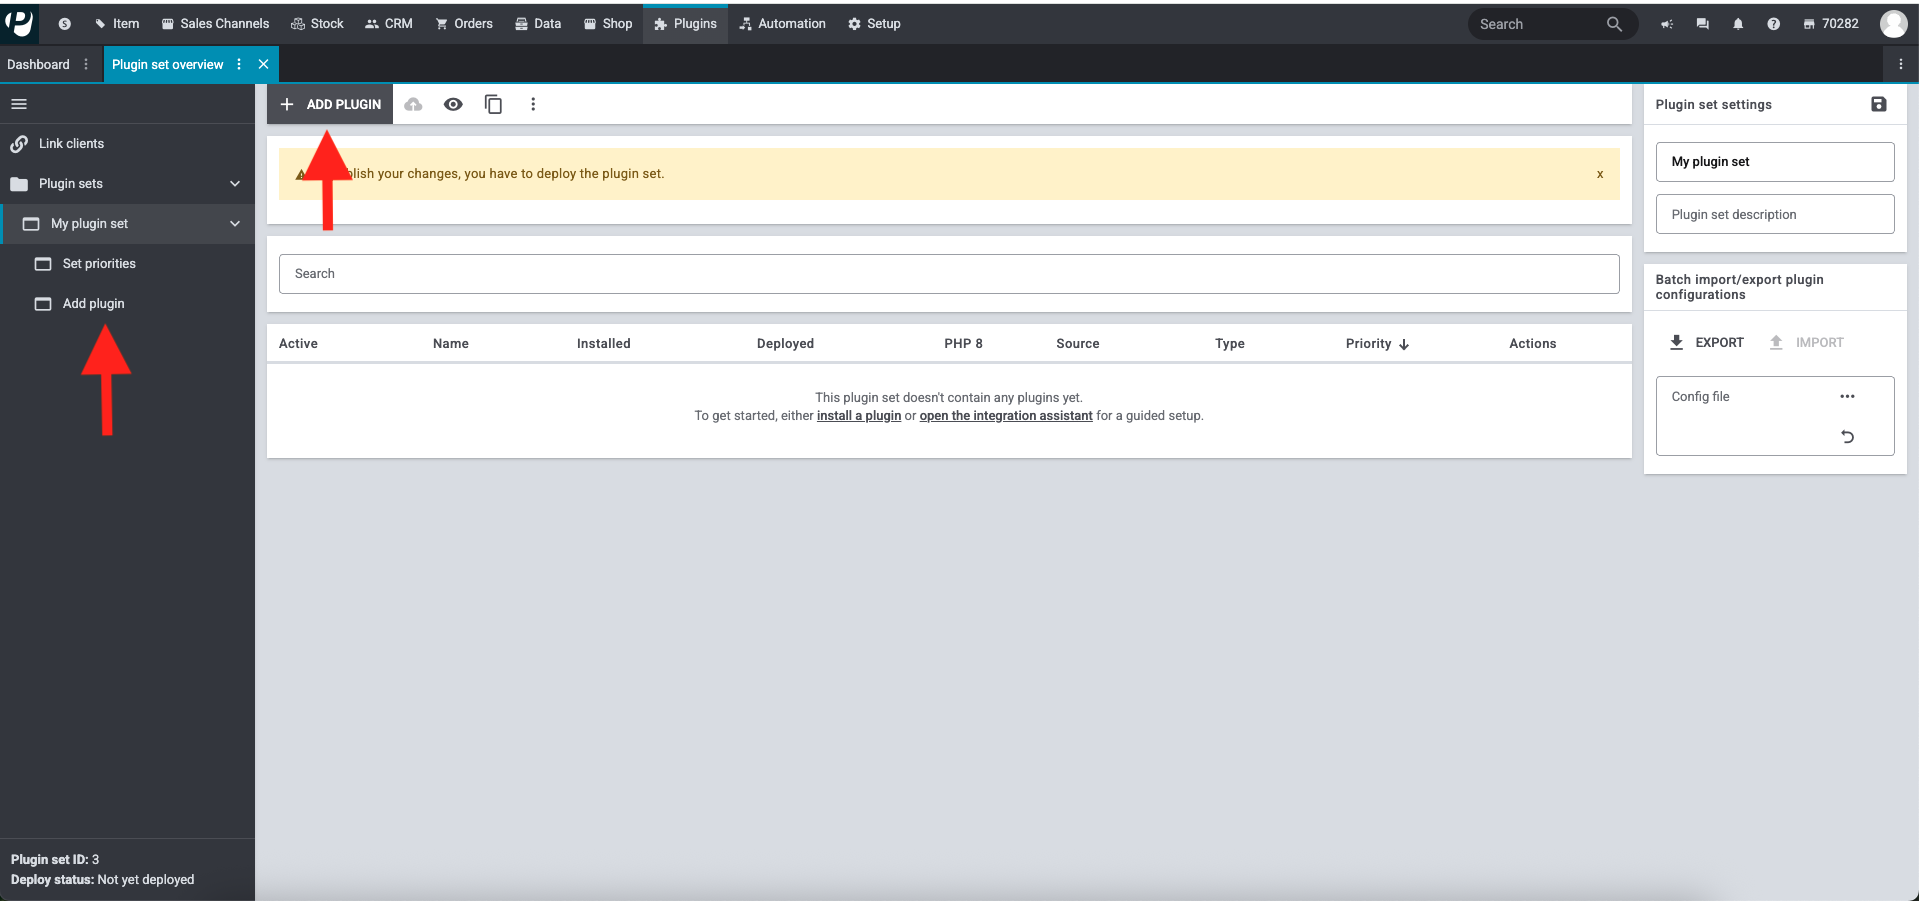
Open the Plugins » Plugin Set menu.

-
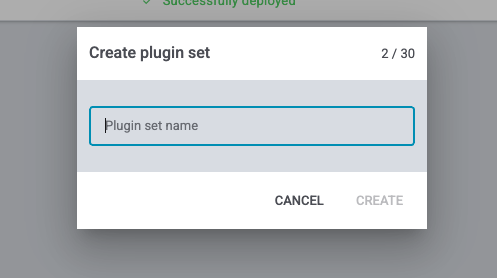
Initiate New Plugin Set (if not already created):
-
Click the "Add plugin set" button on the plugin set overview page.

-
A dialog box opens.
-
Enter a descriptive name for your new plugin set in the "Plugin set name" field.
-
Click on Confirm.
-
-
Select the Newly Created Plugin Set:
-
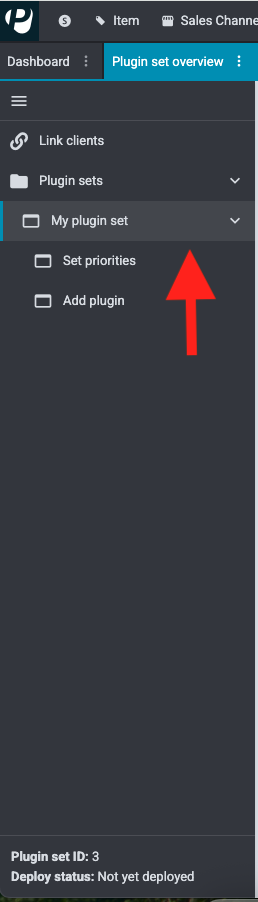
Click on the name of the plugin set you created (or the existing one you wish to use) In the left sidebar.
-
Add a Plugin:
-
Click on "Add plugin" in the main panel or the left sidebar.
-
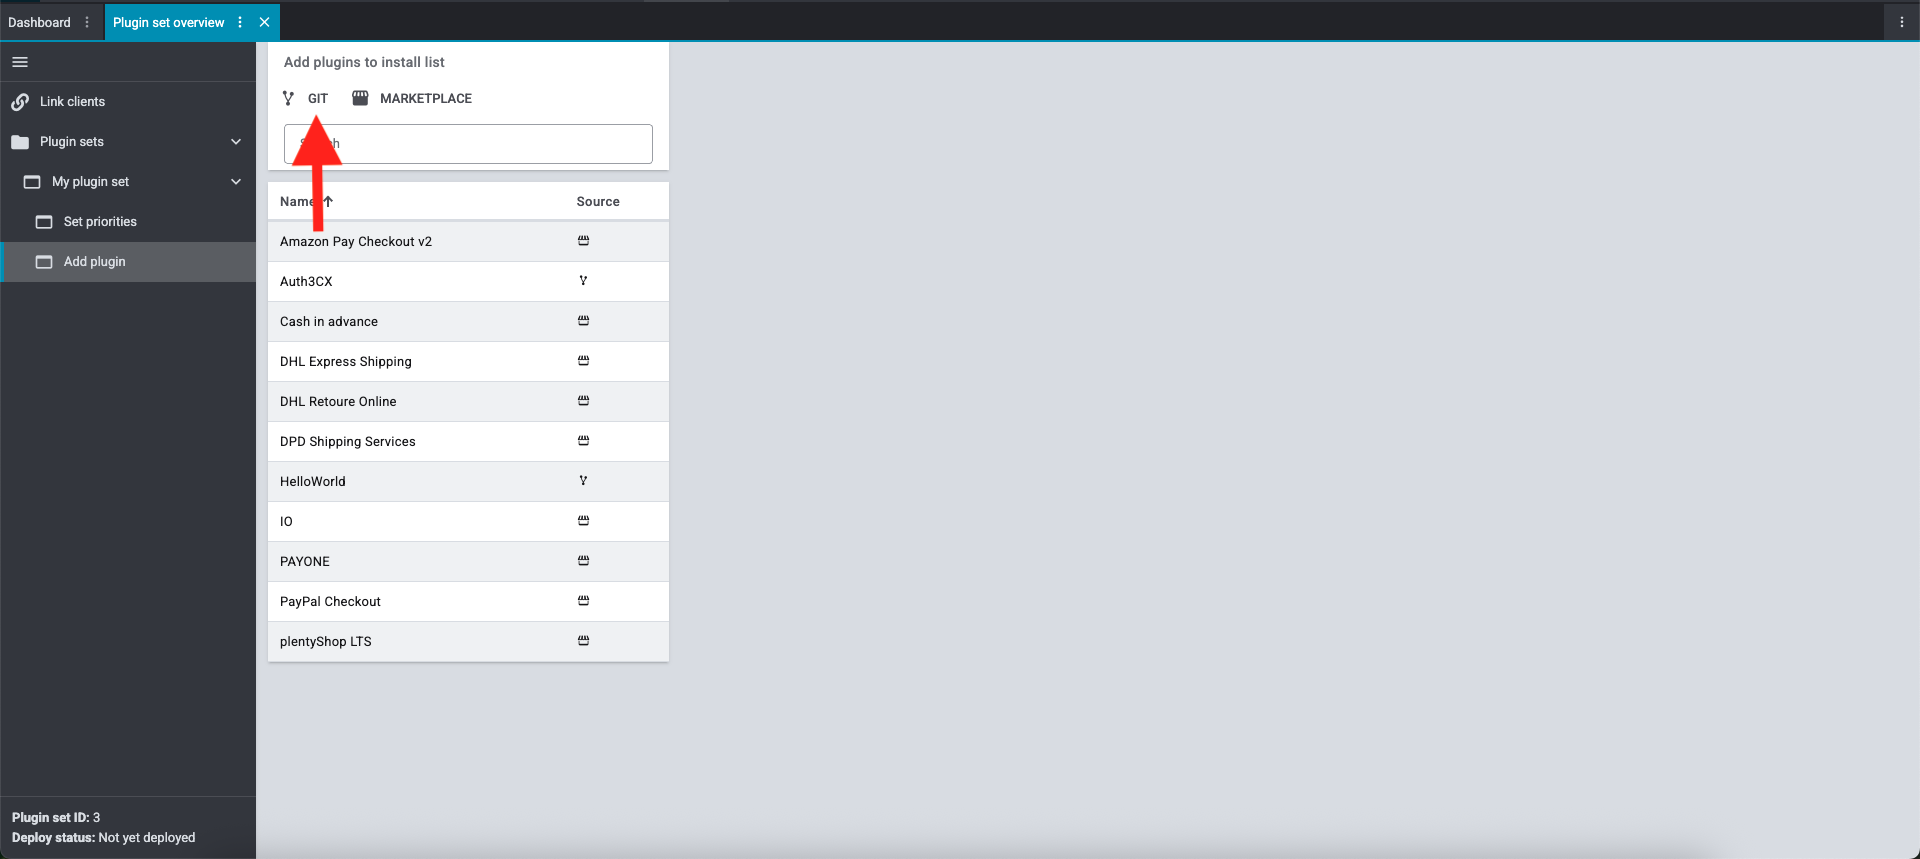
Choose Git as Source:
-
Select the "Git" option In the "Add plugins to install list" dialog.
-
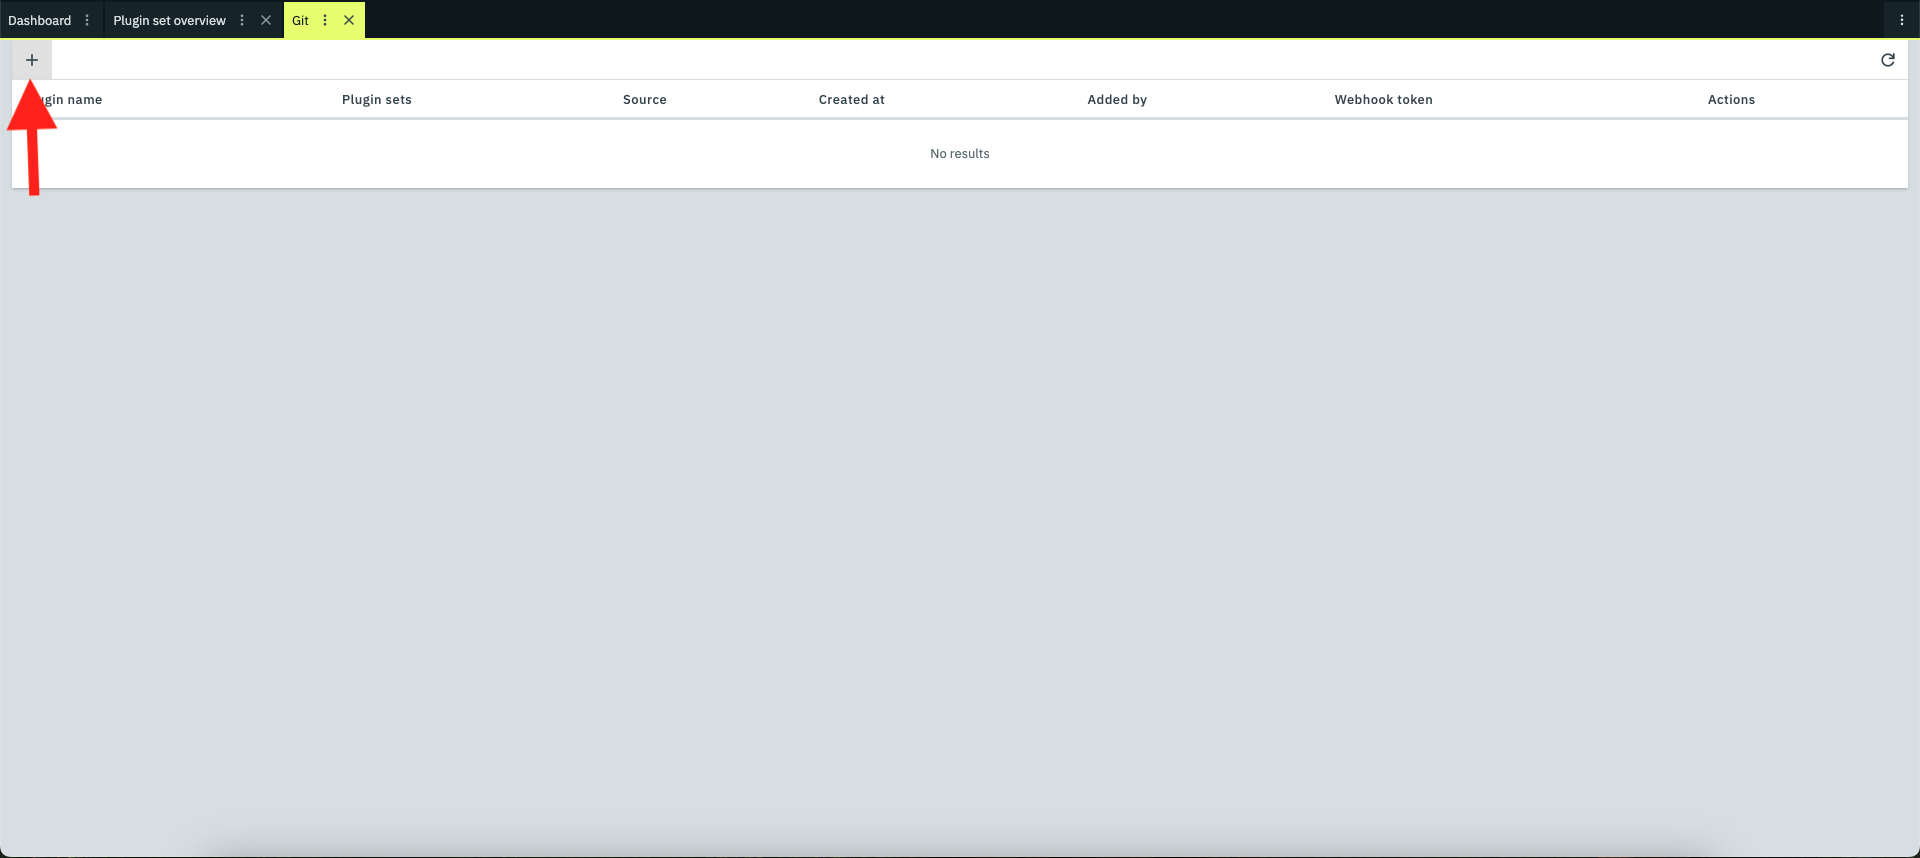
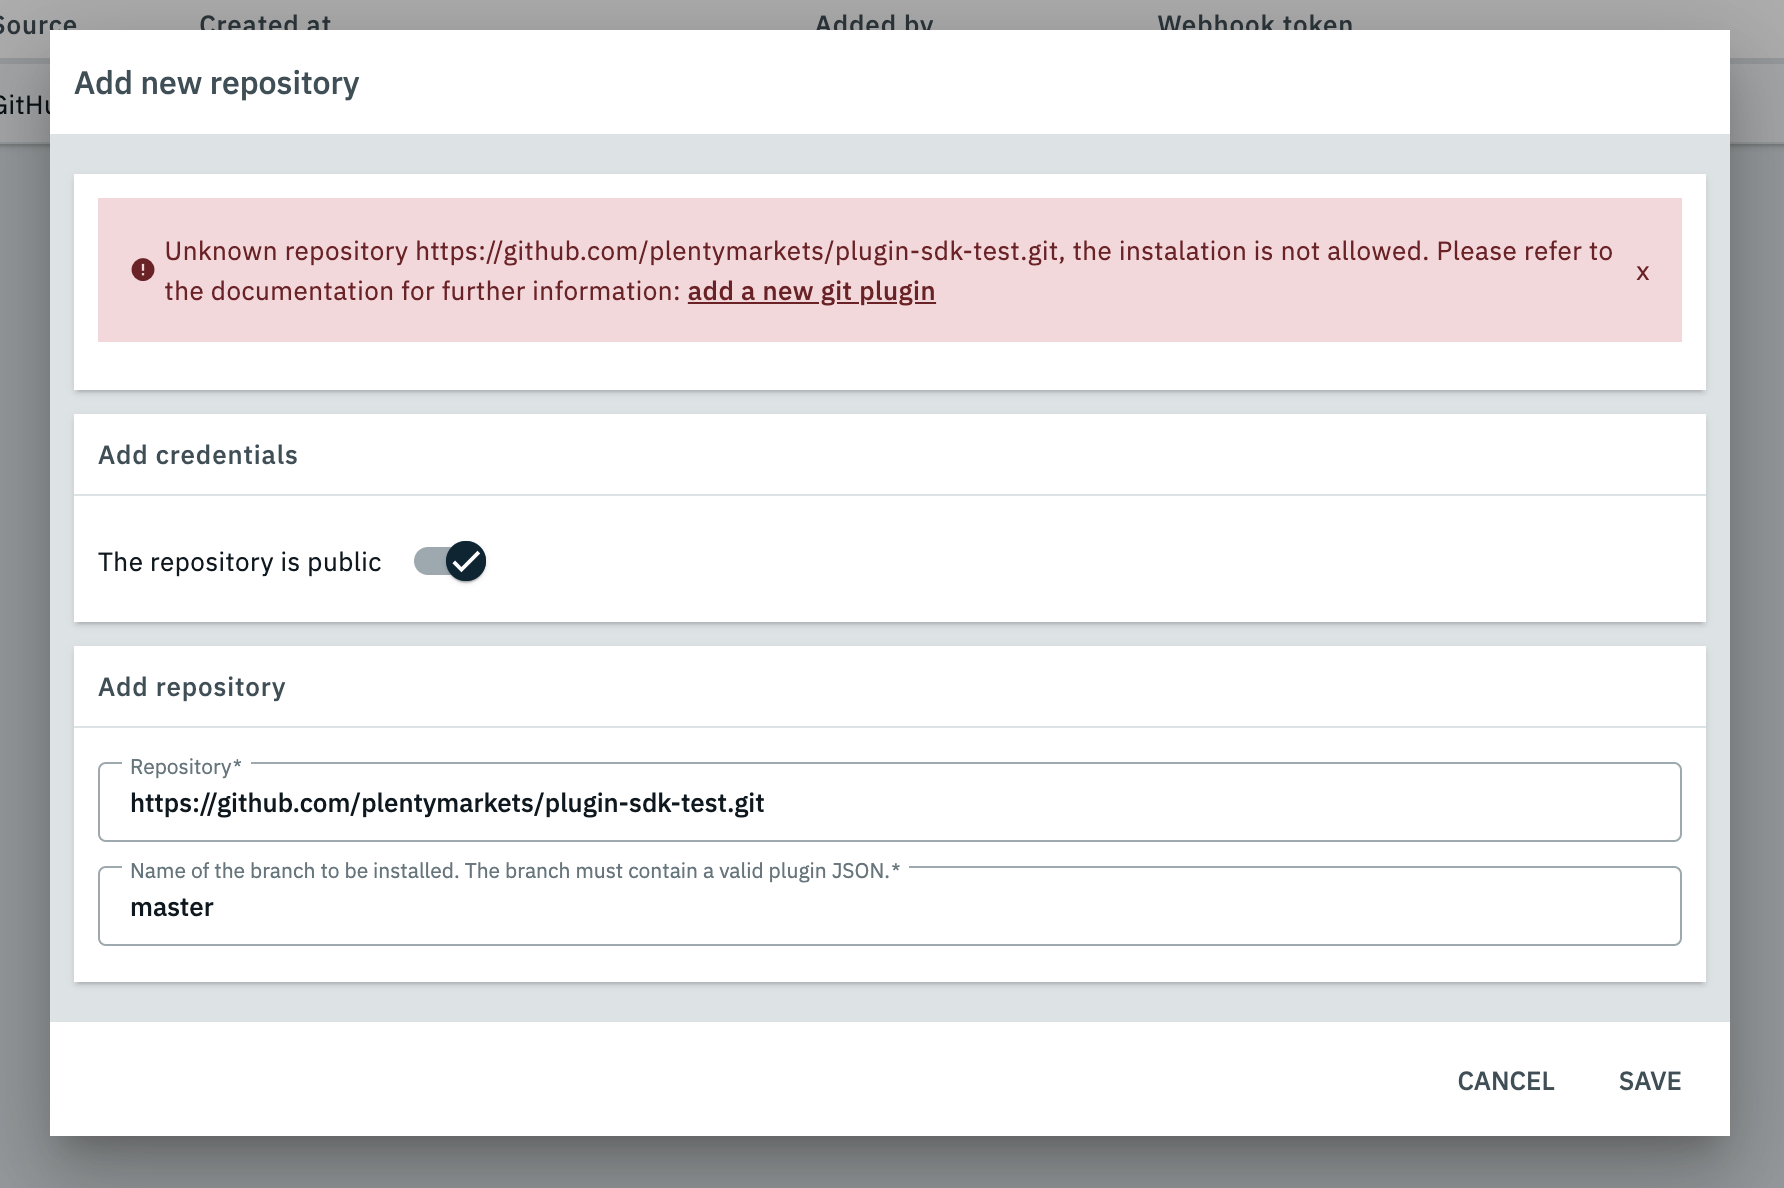
Add New Repository:
-
Click the plus icon to add a new repository for your plugin.
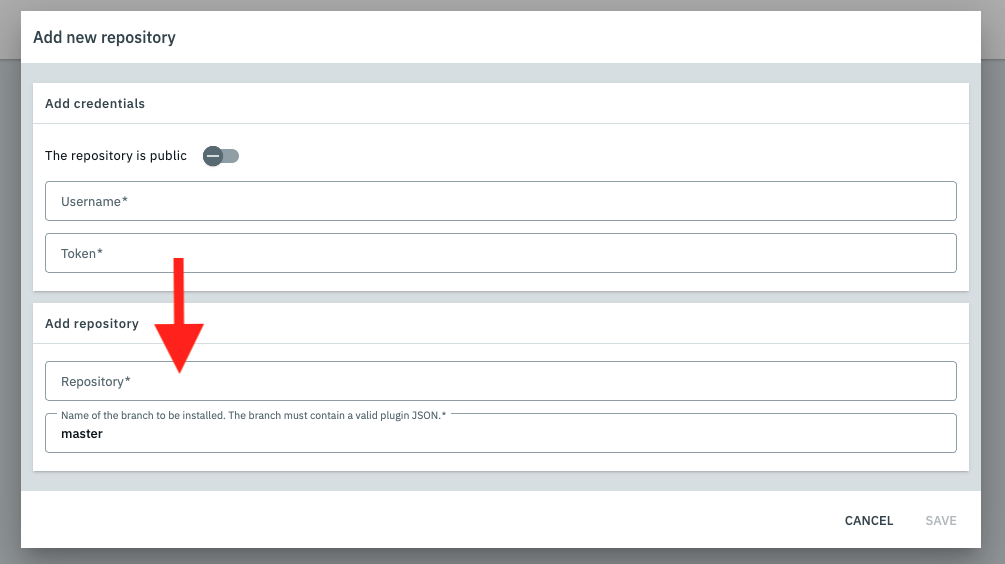
3. Configure Repository Credentials
This step ensures PlentyONE can access your GitHub repository.
-
Configure Repository Access:
-
For Public Repositories: Toggle the "The repository is public" switch to ON.
-
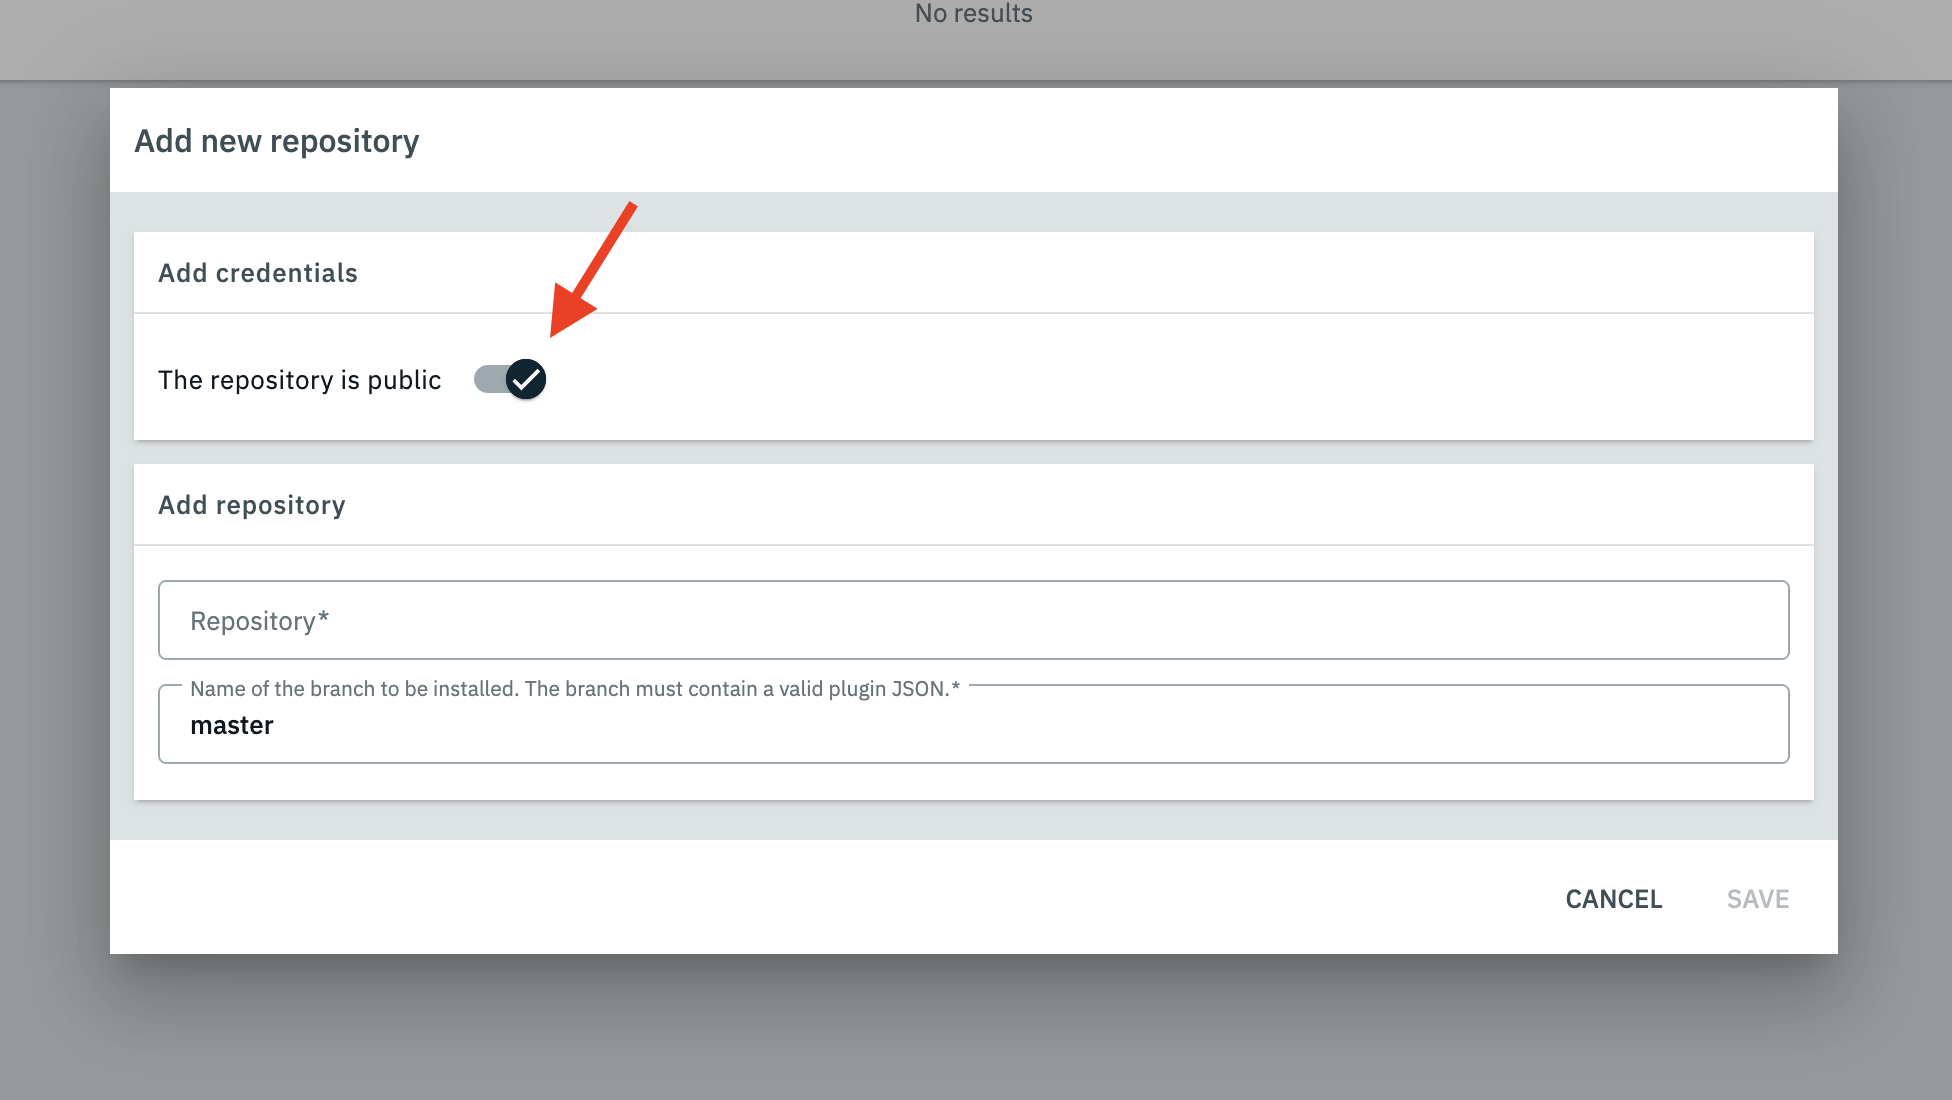
-
For Private Repositories: Leave the toggle OFF. You’ll need to provide:
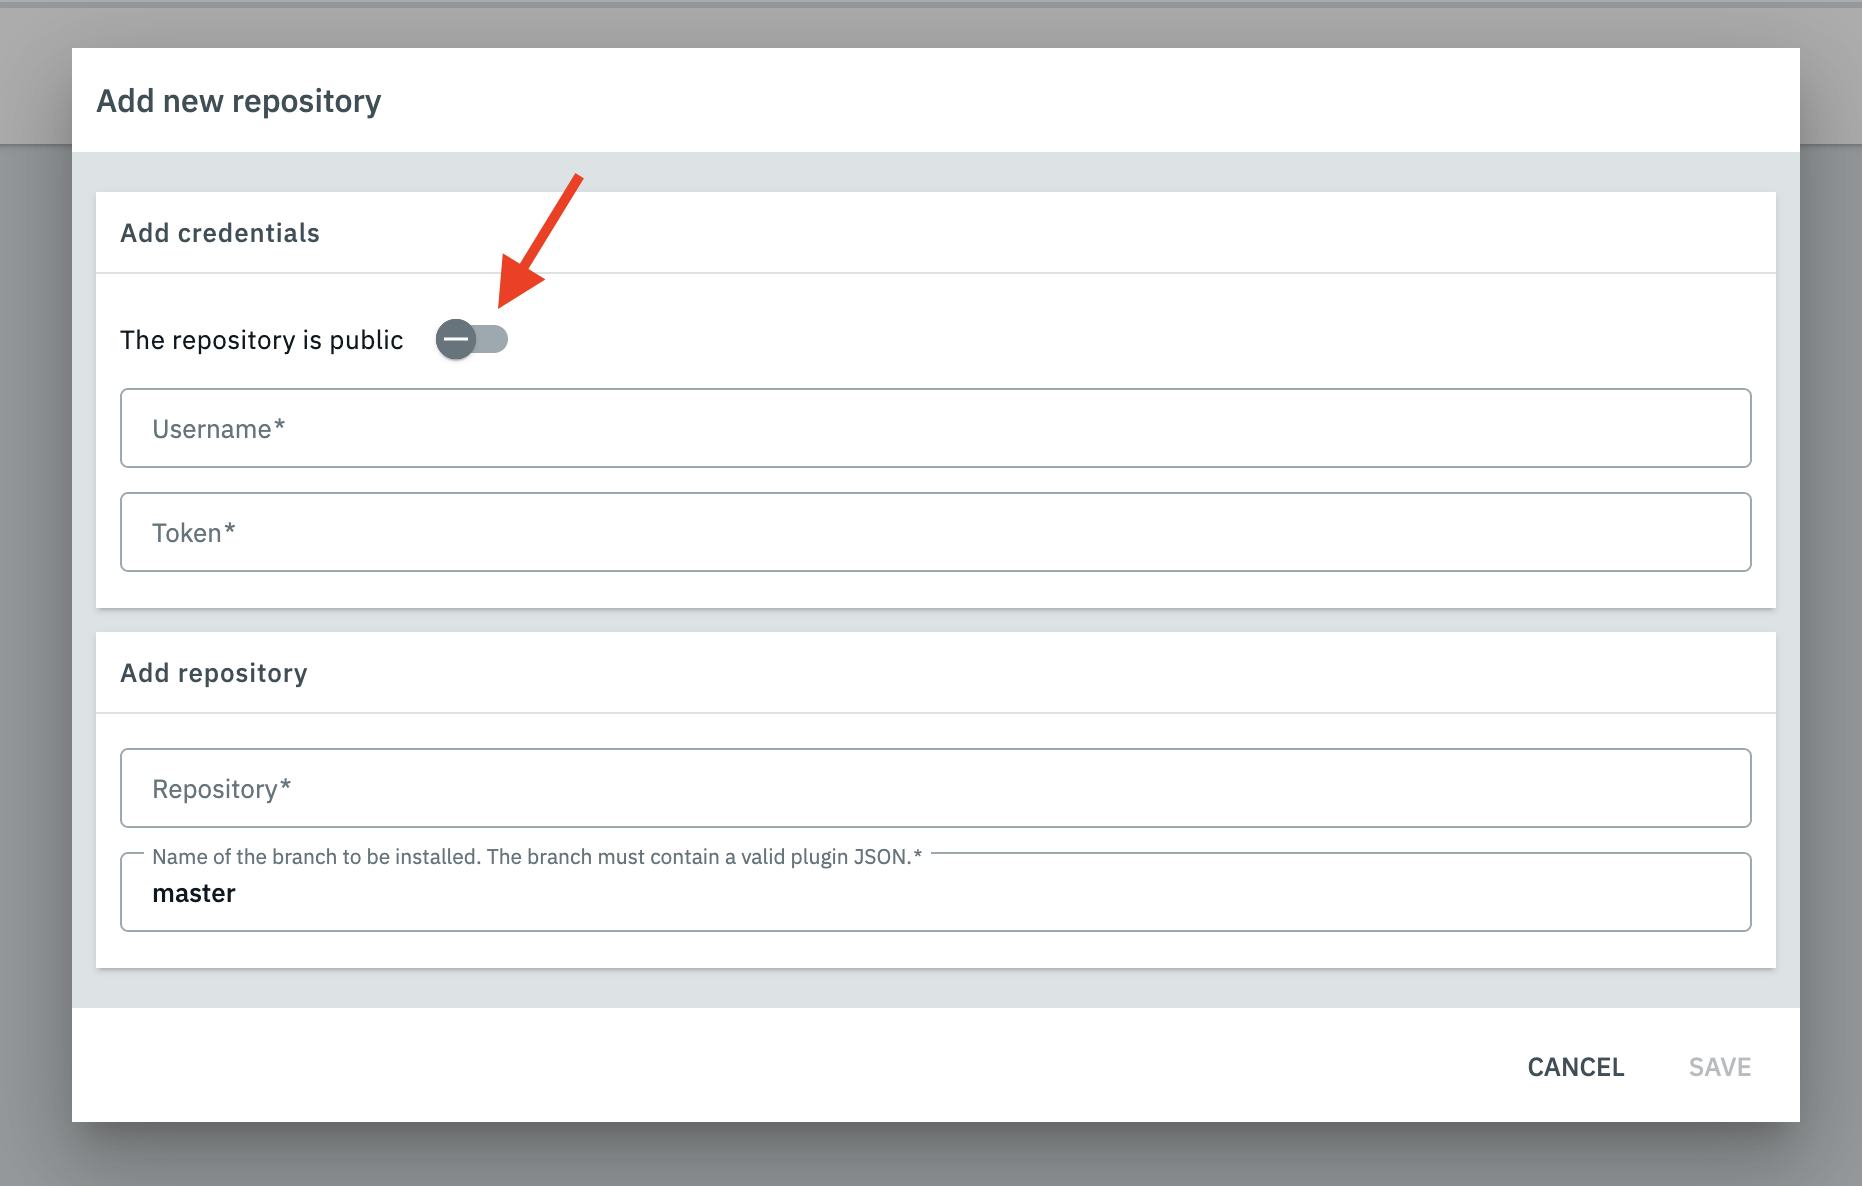
-
Your GitHub "Username".
-
A "Token" (Personal Access Token - PAT).
-
Generate a GitHub Personal Access Token (PAT):
-
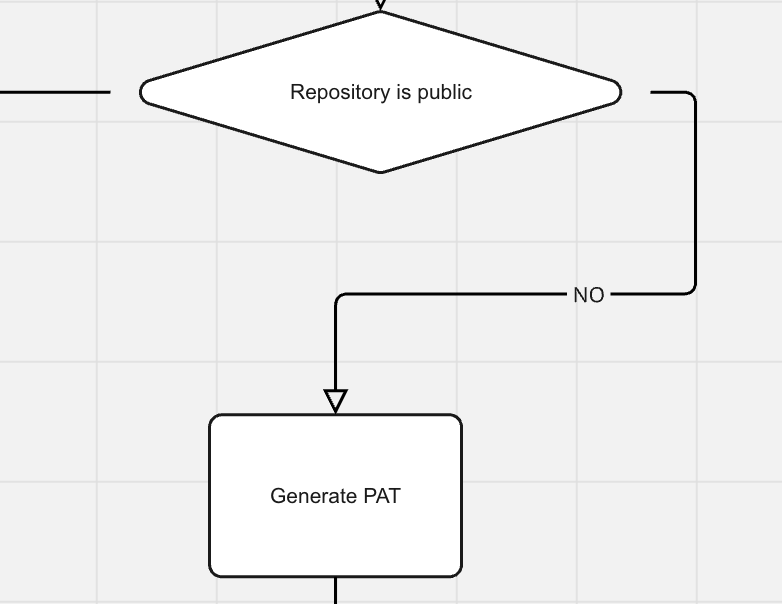
-
Go to GitHub > Settings > Developer settings > Personal access tokens.
-
Click on "Generate new token" (classic or fine-grained).
-
Important: Ensure your token has permissions to read code from the repository.
-
Set an expiration date for the token (e.g., 30 days or a custom duration).
-
Click on "Generate token", then immediately copy the token (it won’t be shown again for security reasons).
-
Important: The token must be valid and not expired during the plugin building process.
-
Paste Repository URL:
-
Paste the GitHub repository URL you copied earlier (from step 3 of "Prepare Your GitHub Repository") into the "Repository" field of the "Add repository" section within PlentyONE.
Note: If your plugin isn’t on the approved plugins list, the repository might not be added. You may need to apply for the plugin approval process in this scenario.
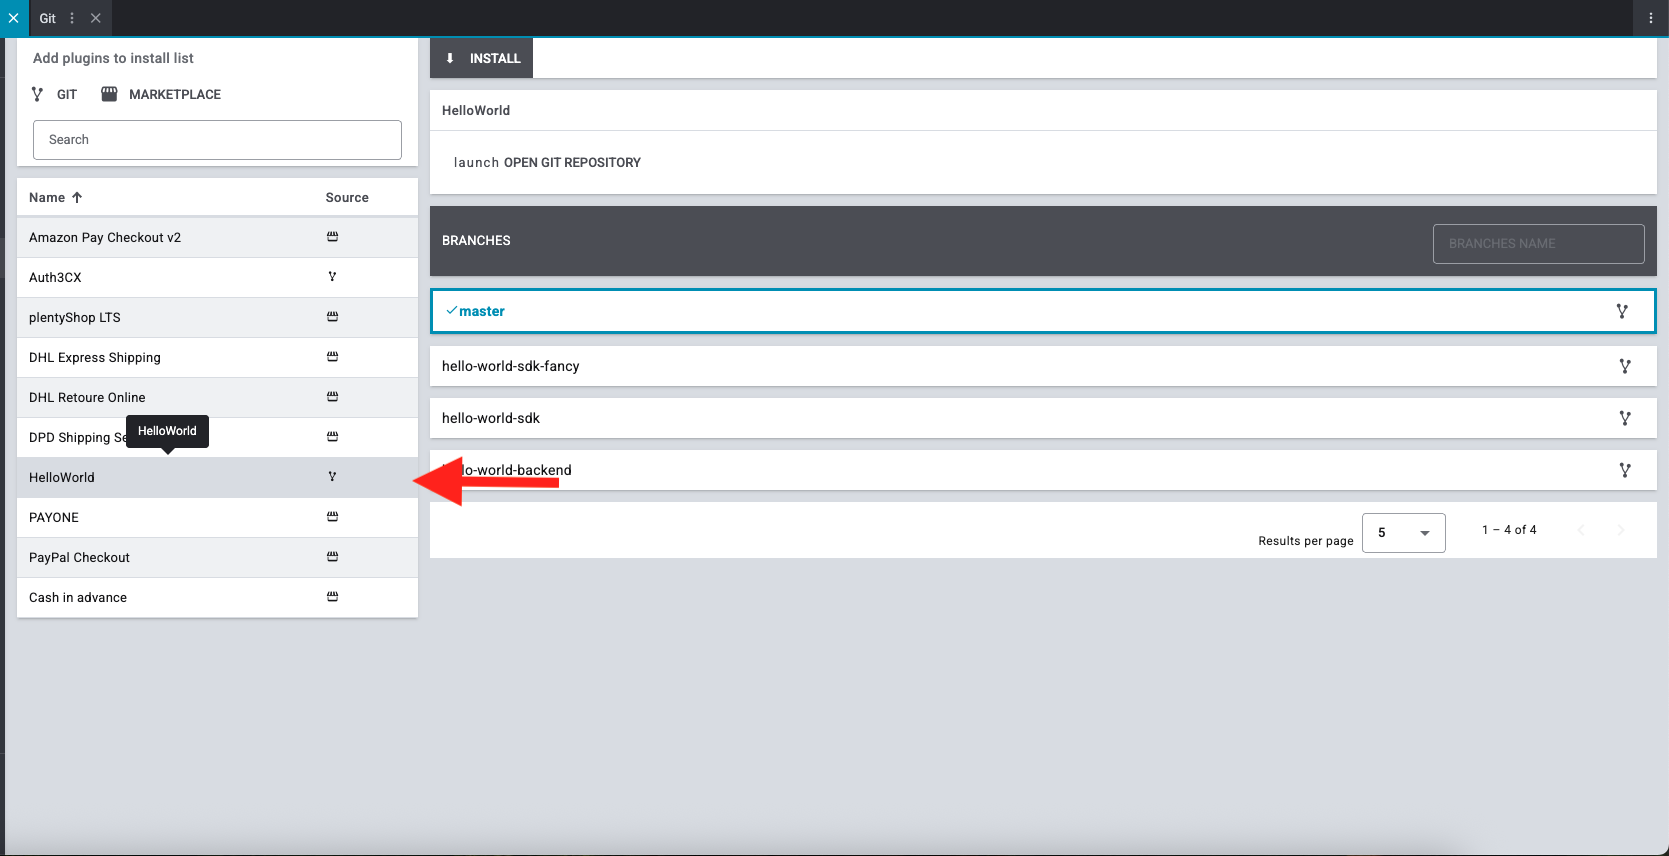
4. Install and Deploy Your Plugin
-
Select Your Plugin for Installation:
-
Click on the name of the plugin you just attached (e.g., "HelloWorld") in the left sidebar.
→ The system will display the available branches from your GitHub repository.
-
Install the Plugin:
-
Click the button to install your plugin at the top of this section.
-
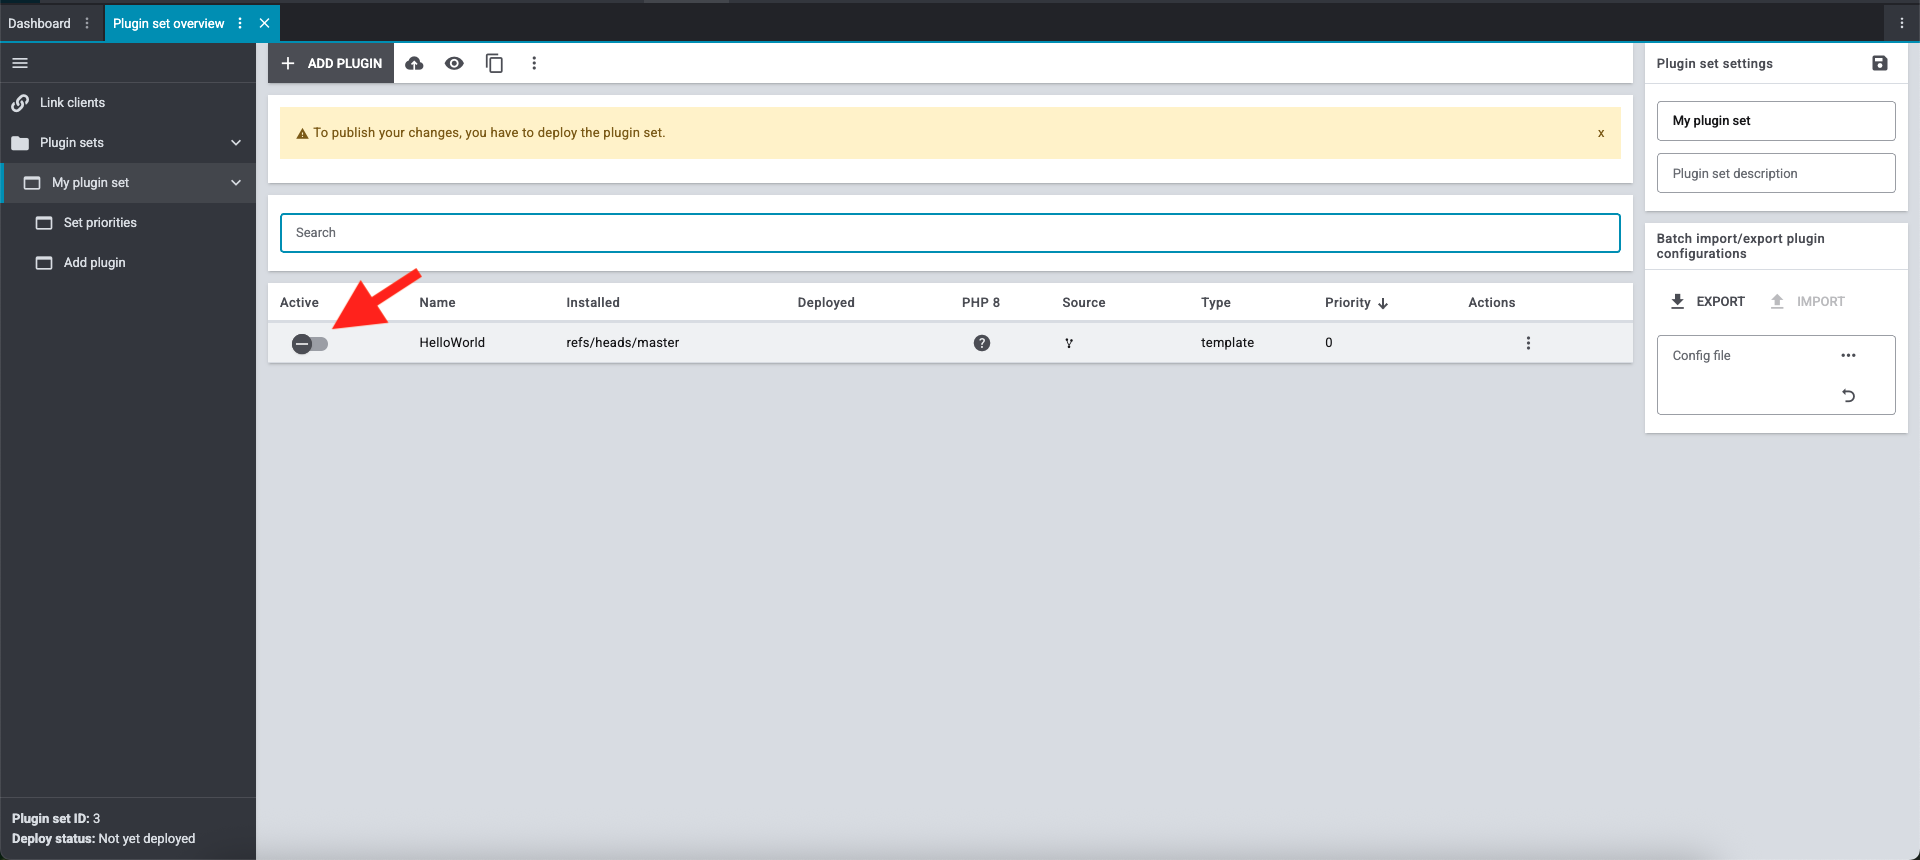
Activate the Installed Plugin:
-
After installation, the plugin’s status will be "disabled" by default. Click the toggle button next to the plugin name to activate it.
-
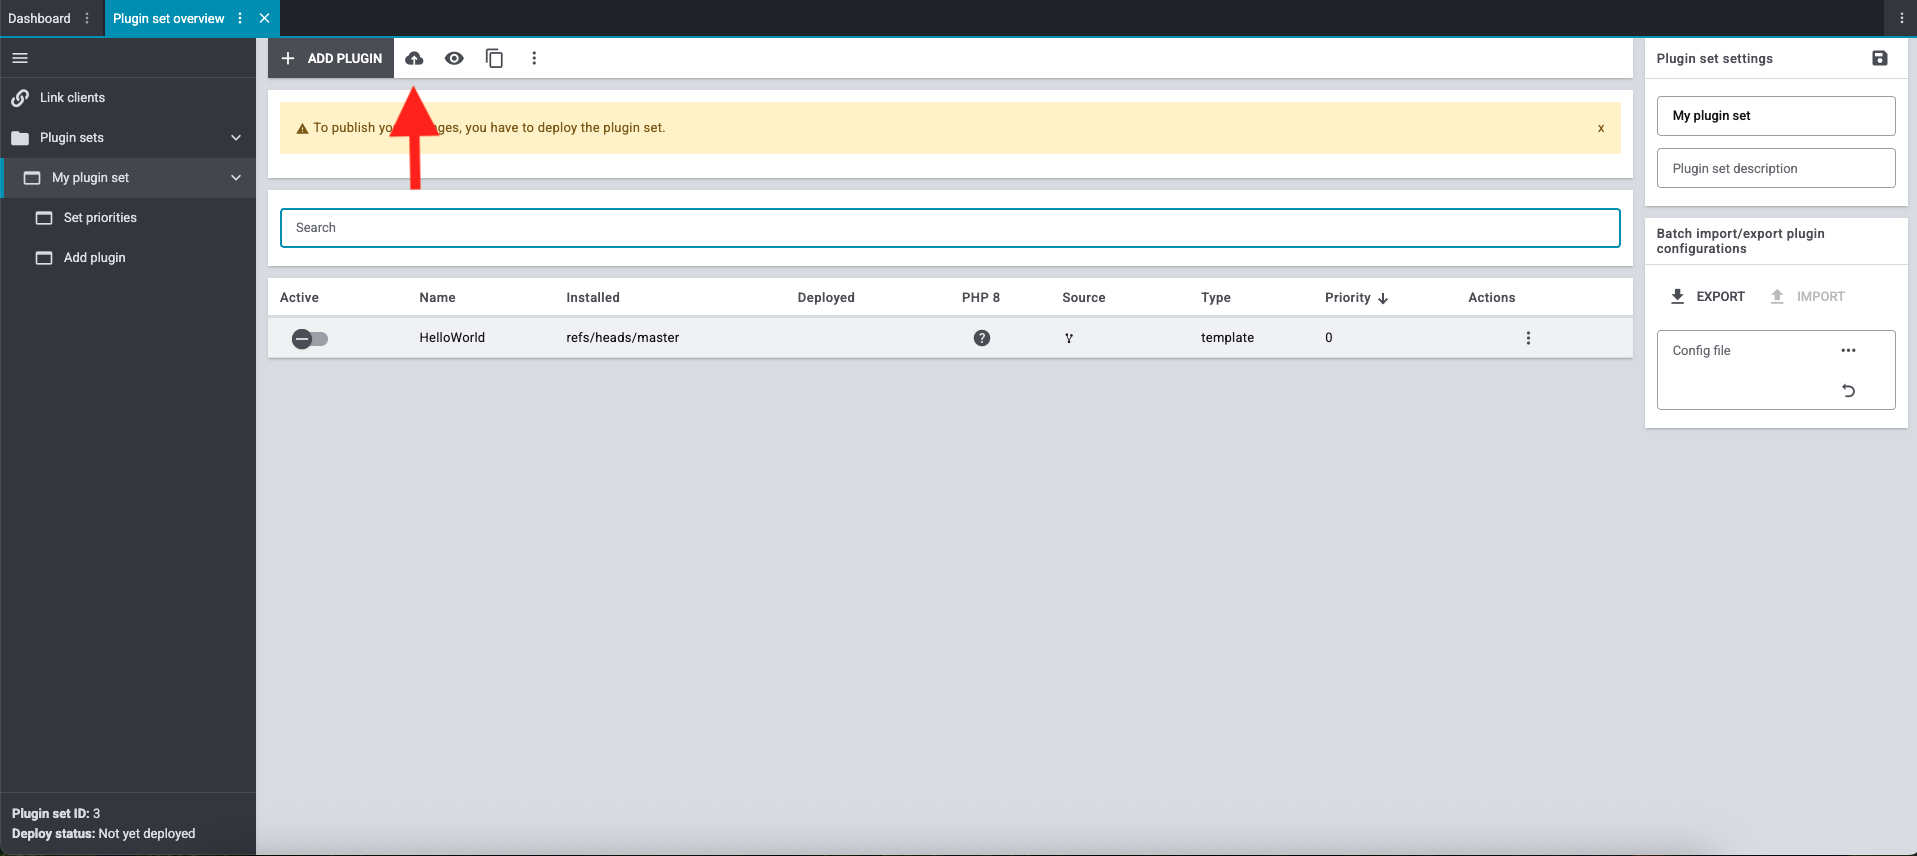
Deploy the Plugin:
-
Click the deploy icon located at the top of the page, next to the "Add plugin" button.
→ Your plugin will be deployed and you changes made live.
-
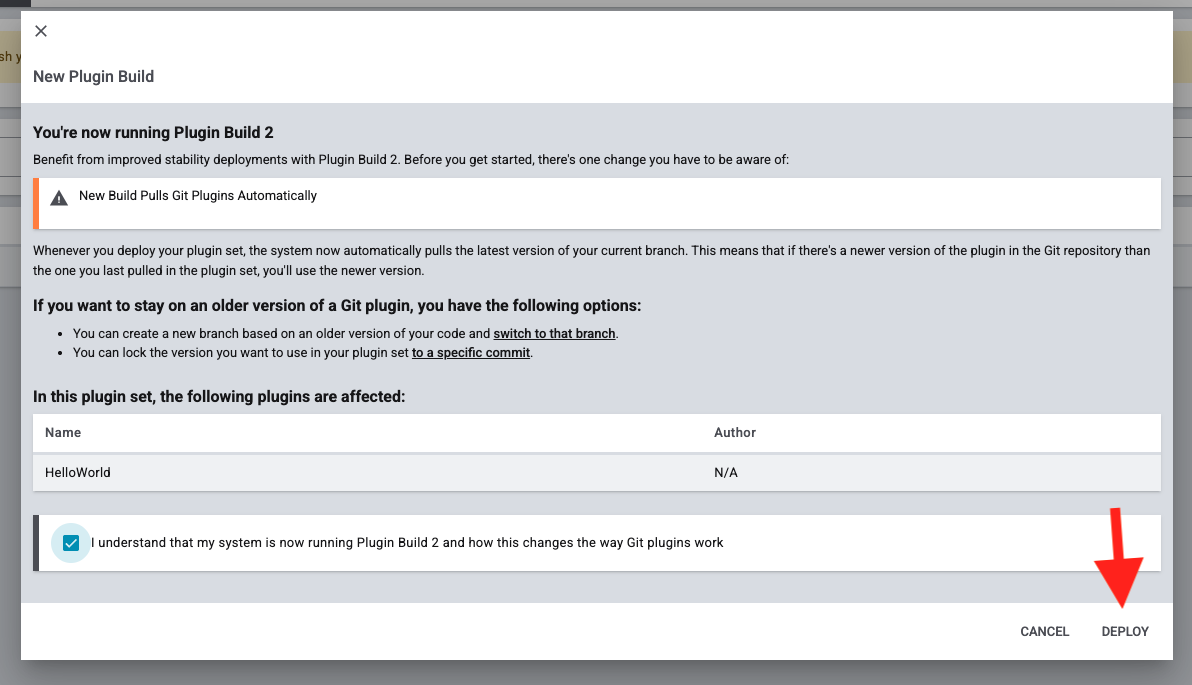
Plugin Deployment Complete: Your plugin is now successfully installed, activated, and deployed, making it ready for use. You will find your deployed plugin listed in the left menu bar.
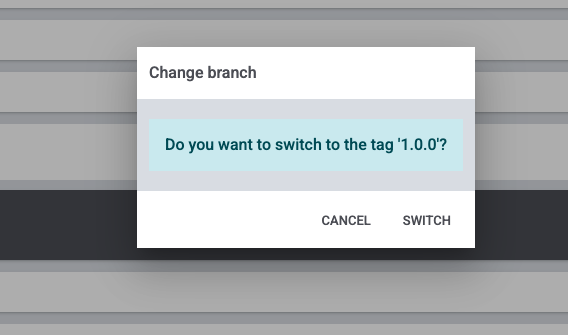
5. Manage Branches/Tags (Optional)
In the Git section of the plugin, you can view the available branches and tags from your repository and switch between them as needed. Remember: Every time you switch branches or tags, a new deploy should be triggered to reflect the changes in your live system.
Once the deployment process has finished, you can check the results.
For this, open your shop in the browser.
Then, append /hello-world to the URL.
Your browser now displays the message "Hello World!".

How to create a git repository for existing DevTool plugin
For migrating a DevTool existing plugin into a Git repository you would be allowed to just import a plugin repository with the same name as the currently DevTool installed plugin.
-
Install GIT in your working environment
-
Create a Repository out of your existing plugin
-
Open the plugin directory with a CLI
-
Run: 'git init'
-
Run: 'git add .'
-
Run: 'git commit "plugin migrated from DevTool" '
-
Push to a Git server you prefer (GitHub, GitLab, Bitbucket, self hosted)
-
In the next step, you will modify your plugin to display data from your system.